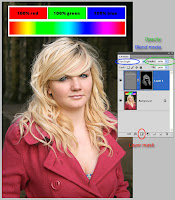
There's a lot of ways of sharpening your image with photoshop, but first we'll talk a bit about a work flow.
Some people favor a 3 step sharpening work flow.
Step 1. is a capture sharpen, this is a mild sharpen usually in camera raw, this is a mild sharpen to replace the sharpening lost by the AA filter on the camera sensor (this stage is usually not needed with jpeg which tend to have in-camera sharpening)
Step 2. Creative sharpening, this is where just part of the image is sharpened for effect, say the eyes in a portrait, or that big rock in the foreground in a landscape.
Step 3. Output sharpening, this is the final sharpen and will vary depending on size and whether it's for web or print.
Note all sharpening should be done viewing the image at 100%, photoshop doesn't display images correctly at other sizes as far as sharpening and noise reduction are concerned.
On to the sharpening, in the raw converter I have applied a little bit of sharpening, then opened the image in photoshop proper.
First I create a duplicate layer, (layer/duplicate layer), next I go to filter/other/high pass, this turns your image a horrid grey, don't worry it's supposed to look like that at this stage, now adjust the radius until you can see the edges of your image, now it's going to vary with image size and content but somewhere between about 5-10 should do it.
Now open your layers palette if it's not open (window/layers) now on the top grey layer in a box at the top you'll see the word normal, this is the layer blend mode, click the little downward arrow and change it to hard light, now your image suddenly looks sharp.
Now if you wanted to sharpen the whole image at this stage just adjust the opacity (next to where you changed to overlay) until it looks as sharp as you want and flatten the layer (layer/flatten)
If on the other hand you wanted to selectively sharpen on your layers palette is a layer mask icon (grey square with a white circle in it) first make sure your on the top layer (the hard light one) now hold down the ALT key and click the layer mask button, this creates a mask that hides all the top layer, now click the brush tool, choose white as a foreground colour (on the colour boxes on the left toolbar D on the keyboard will reset them) now paint in the bits you want sharp, say the eyes in this image, I then lowered the opacity and gave the hair a run over to pull out the detail a bit. Finally adjust the opacity until your happy.
The last stage is to resize your image and add a bit of sharpening to suit the output, again this will vary with size and if it's for web ot print.
No comments:
Post a Comment